Layers
What goes to the screen is not one flat picture. The stage is seven layers stacked on top of each other, and each one goes up and comes down on its own. Put a moving background on the bottom, the words on the foreground and a logo on an overlay — then change the words without touching the other two.
The seven layers
Section titled “The seven layers”From the top down, in the same order as the layer column beside the stage preview:
1 Overlay top2 Overlay3 Overlay4 Overlay5 Overlay just above the foregroundF ForegroundB Background bottomThe overlay numbers are heights, not a running order: 1 is always on top, and 5 always sits right above the foreground. The numbers can’t be changed — only their names (see Naming the overlays). Under all seven, the output screen is black.
Where a slide draws nothing, you see the layers below it. A text slide with no background colour is see-through around its text, so words on the foreground sit on top of whatever the background is showing. A slide with a background colour covers everything under it.
There is one stage, however many monitors you use. Each monitor can show only some of the layers — that is Multi-Output.
What each layer takes
Section titled “What each layer takes”| Layer | What can go on it |
|---|---|
| 1 Overlay – 5 Overlay | Pictures, videos, text slides, YouTube |
| Foreground | Any slide except music |
| Background | Pictures, videos, text slides, YouTube |
A music slide goes on no layer. It has nothing to draw, so it plays as sound only, on the music channel — see Music.
A slide goes out on the foreground until you choose another layer for it — or give it a background in the slide editor, which makes it a Background slide (see The background).
Putting a slide on a layer
Section titled “Putting a slide on a layer”The chip on the card
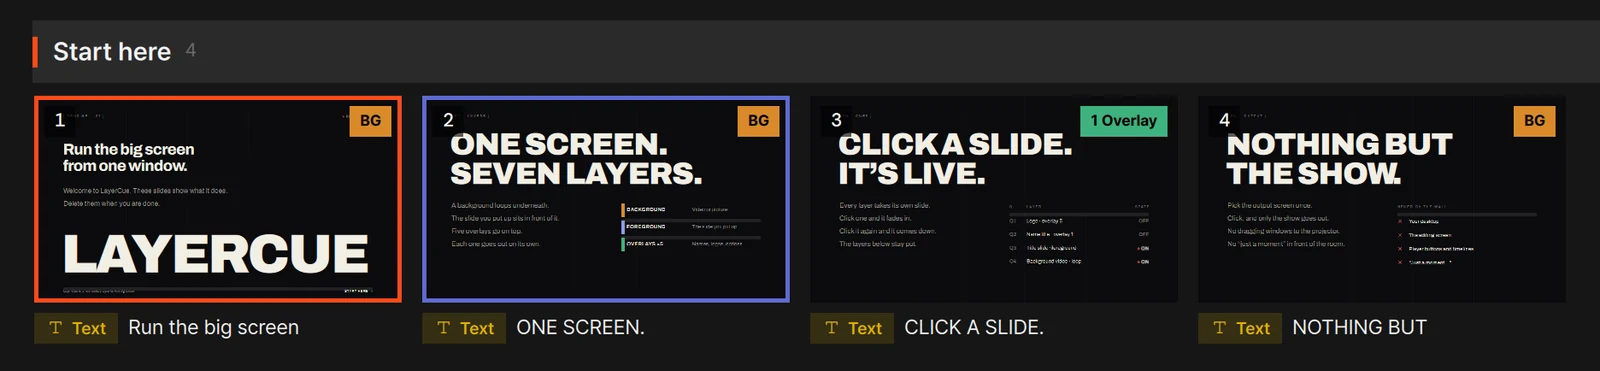
Section titled “The chip on the card”The chip at the top right of a card shows which layer the slide goes out on, in that layer’s colour: indigo for the foreground, amber for the background, green for the overlays. The layer column beside the stage preview uses the same colours.
| The chip reads | Meaning |
|---|---|
| BG | Background. Always shown |
| 1 Overlay … 5 Overlay, or the name you gave it | That overlay. Always shown |
| FG | Foreground. Shown only while the pointer is over the card |
| Music | A music slide. Clicking it does nothing |
| To | Do this |
|---|---|
| Switch between foreground and background | Click the chip |
| Move to the next overlay (1 → 2 → … → 5 → 1) | Click the chip while it shows an overlay |
| Move to overlay 1 | Press and hold the chip |
| Come back from an overlay to the foreground | Press and hold the chip again |
The card’s right-click menu does the same: Overlay ▸ lists the five overlays, and Layer ▸ has Foreground and Background. A ● marks the one the slide is on.
If the card is part of a selection, the whole selection changes, and Changed layer for N tells you how many. If it isn’t, only that card changes.
A layer change is one step you can undo with ⌘Z / Ctrl+Z. While editing is locked, layers
can’t be changed — see Screens and going live.
One layer for a whole presentation
Section titled “One layer for a whole presentation”Layer for this list, on the presentation’s title bar, sends every slide in that presentation to one layer. While it is set, the chips on its cards are dimmed and can’t be clicked. Each slide’s own layer is kept, and comes back when you choose Per slide. The right-click menu still sets a slide’s own layer — the one it goes back to. Details in Presentation settings.
Changing the layer of a slide that is up
Section titled “Changing the layer of a slide that is up”Changing a slide’s layer does not move it on stage. What is up stays where it is, sound included. The new layer counts from the next time the slide goes out.
The one exception: an overlay that is up and is moved to the foreground or the background comes down from its overlay, fading out over its presentation’s Fade out.
The background
Section titled “The background”A background slide is split in two
Section titled “A background slide is split in two”When a slide set to Background goes out, its background — the picture or video in the slide editor’s background row, its background colour or gradient — goes to the background layer. Everything placed on top — text boxes, pictures, shapes, video boxes — goes to the foreground.
- If nothing is placed on top, the foreground is left alone: what was there stays up.
- If something is placed on top, it replaces what was on the foreground.
- If the slide has no background at all, the background layer is left alone: the background that was up stays.
A slide set to Foreground or to an overlay goes out whole, background and all.
This is what makes the background behave the same everywhere: the B and F chips, their × buttons and the B and F cells of a monitor’s Layers shown all mean the same thing. A stage monitor with B off shows a Background slide’s words without its background.
Background slides by themselves
Section titled “Background slides by themselves”Put something in a slide’s background row in the slide editor — a picture, a video, a colour or a gradient — and the slide becomes a Background slide, as long as you have never set its layer. Empty the row again and it goes back to the foreground. A slide you set to Foreground yourself stays on the foreground: its background then goes out with it, in one piece. A YouTube or web slide never moves by itself: give it a background colour and it stays on its layer. See The slide editor.
Backgrounds start silent
Section titled “Backgrounds start silent”Moving a slide to the background turns its sound down to 0 — a background is usually there for atmosphere. Move it back and it gets the volume it had before. Each side remembers its own value: turn it up while it is on the background, and that is what it gets the next time it goes there.
A video in a video box is part of what sits on top, not the background: even on a Background slide it keeps its sound and, unless you set it to repeat, plays once.
Backgrounds repeat
Section titled “Backgrounds repeat”A video or YouTube on the background repeats until you take it down. On the other layers it plays once and stops on its last frame. To change this for one slide, use the repeat button in Slide settings (its tooltip reads Loop or Play once). Once you set it yourself, it stays that way whichever layer the slide is on. See Slide settings.
By default, a repeating video on the background cuts when it jumps back to its start. To let the end overlap the start instead, set Loop crossfade in the same panel, or Settings › Stage › Background loop crossfade (0 by default) for every slide that has no value of its own. While it overlaps, the clip plays twice at once, so a 4K video — or one with a blurred background — can get heavy.
Overlays
Section titled “Overlays”- One slide per overlay. Send a slide to an overlay that is already in use and it replaces what is there, fading in over it with its presentation’s Crossfade.
- Different overlays stack. A logo on 1 and a name caption on 3 both stay up.
- The same slide can’t be up on two overlays at once.
- An overlay goes up whole — picture, background colour and text together. Only the background splits a slide.
- Only one streaming YouTube can be on stage at a time. Start a streaming YouTube on a second overlay and the first one comes down. It still reaches every monitor that shows its layer — see Multi-Output. A downloaded YouTube plays like any video. See YouTube.
A presentation can also take its overlays down by itself after a set time — Auto-dismiss, in Presentation settings.
Naming the overlays
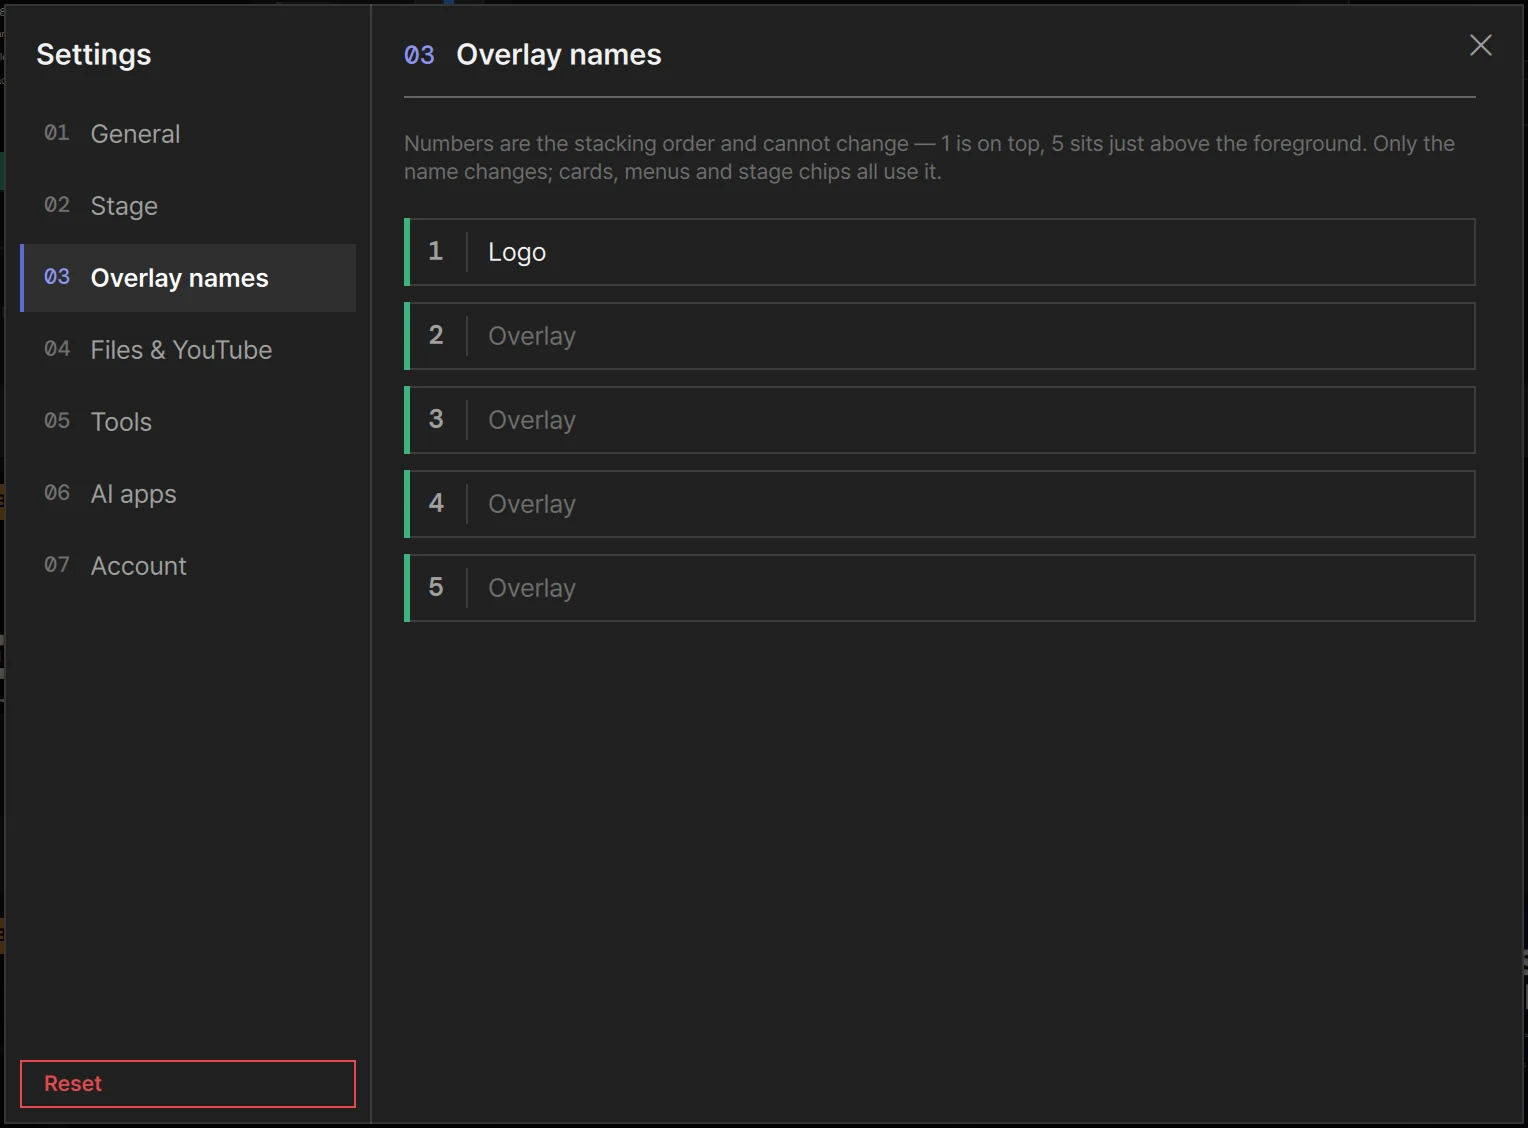
Section titled “Naming the overlays”In Settings › Overlay names, each overlay has a row with its number fixed at the front. Type a name of up to 12 characters; leave it empty and it stays Overlay. The names belong to the app, not to one presentation.
The number always comes first, so a named overlay reads 1 Logo. The name appears on card chips, in the Overlay ▸ menu, in the Layer for this list list, and in the control row while you control that overlay. The layer column beside the preview shows only the number — the name is in its tooltip, as it is in the Layers shown cells under each monitor’s preview.
The layer column beside the preview
Section titled “The layer column beside the preview”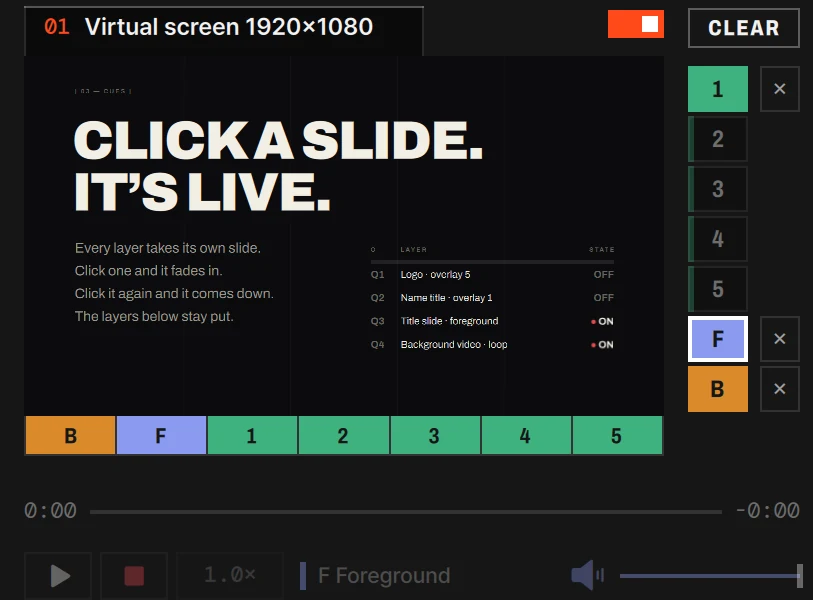
To the right of the stage preview is the layer column — one row per layer, in stacking order, with CLEAR at its head:
| Row | What it is |
|---|---|
| CLEAR, in the header line above the column | Clear All. Dimmed while nothing is up; it turns orange when you point at it |
| 1–5 | The overlays |
| F | The foreground |
| B | The background |
All seven rows are always there. A row’s cell fills with its layer’s colour while something is on that layer; an empty layer is a dark cell with a faint stripe of its colour at the left — so the column shows at a glance what is up and where there is room. A small × appears to the right of a cell only while that layer has something to take down (Clear this layer).
The column belongs to the stage, not to one monitor: what you take down here leaves every monitor. To keep a layer up but off one monitor, turn its cell off in that monitor’s Layers shown.
While anything is up, every card that is up has an orange border.
Which layer the controls work on
Section titled “Which layer the controls work on”The control row under the preview — progress bar, play / pause, the red ■, speed, and at the right end mute and volume — works on one layer at a time: the cell with the white outline. Click another lit cell to switch; its tooltip gives the layer’s name. The row also writes the name of the layer it is controlling, after the speed button, beside a bar in that layer’s colour.
The outline also moves by itself: to the layer of a video or YouTube you send out, and to the layer of a slide you select. When the layer it is on comes down, it goes back to F — unless the slide you have selected is on that layer.
The red ■ takes down the layer you are controlling. It works only while that layer has a video or a YouTube on it; to take everything down, use CLEAR.
Speed and volume changed here are for now only — they are not saved into the slide. For the sound side, see Sound and the meter.
Taking layers down
Section titled “Taking layers down”Taking something down is always its own action:
| To take down | Click | Keys |
|---|---|---|
| Everything | CLEAR at the head of the layer column (Clear All) | F1 · ⌘1 / Ctrl+1 |
| The foreground | The × beside F | F2 · ⌘2 / Ctrl+2 |
| The background | The × beside B | F3 · ⌘3 / Ctrl+3 |
| One overlay | The × beside its number | — |
| All five overlays | — | F4 · ⌘4 / Ctrl+4 |
| The layer you are controlling | The red ■ under the preview, while that layer has a video or YouTube | — |
Each layer fades out over the Fade out of the presentation its slide came from — the same for the ×, CLEAR, the ■ and the keys. At 0 it goes at once. See Presentation settings.
Overlays can also come down without a click: when Auto-dismiss runs out, when another slide replaces them on the same overlay, or when they are moved off the overlays (see above). Changing Layer for this list takes down that presentation’s overlays that are no longer overlays, and tells you Cleared N overlay(s).
Three things do not take layers down:
- Clear All does not stop the music. The music channel has its own controls — see Music.
- Turning a monitor off takes nothing down. Its power switch — or the ✕ on its output screen — closes that monitor’s window only. The layers carry on in the preview and on the other monitors, sound included, and are there again when you turn it back on. See Screens and going live.
- Turning a cell off in Layers shown hides that layer on that one monitor; it stays up on stage.
When several videos play at once
Section titled “When several videos play at once”When more than three videos are playing at the same time — counting the foreground, the background and the overlays, and the videos in video boxes — LayerCue warns Several videos are playing — playback may stutter, followed by the overlay numbers involved. It tells you once each time the count goes over the line. Nothing is stopped.
What goes in and out over how long is set per presentation in Presentation settings. Choosing the screen and turning monitors on and off is in Screens and going live.